

Moonlight Peaks: Cheeken Amigurumi
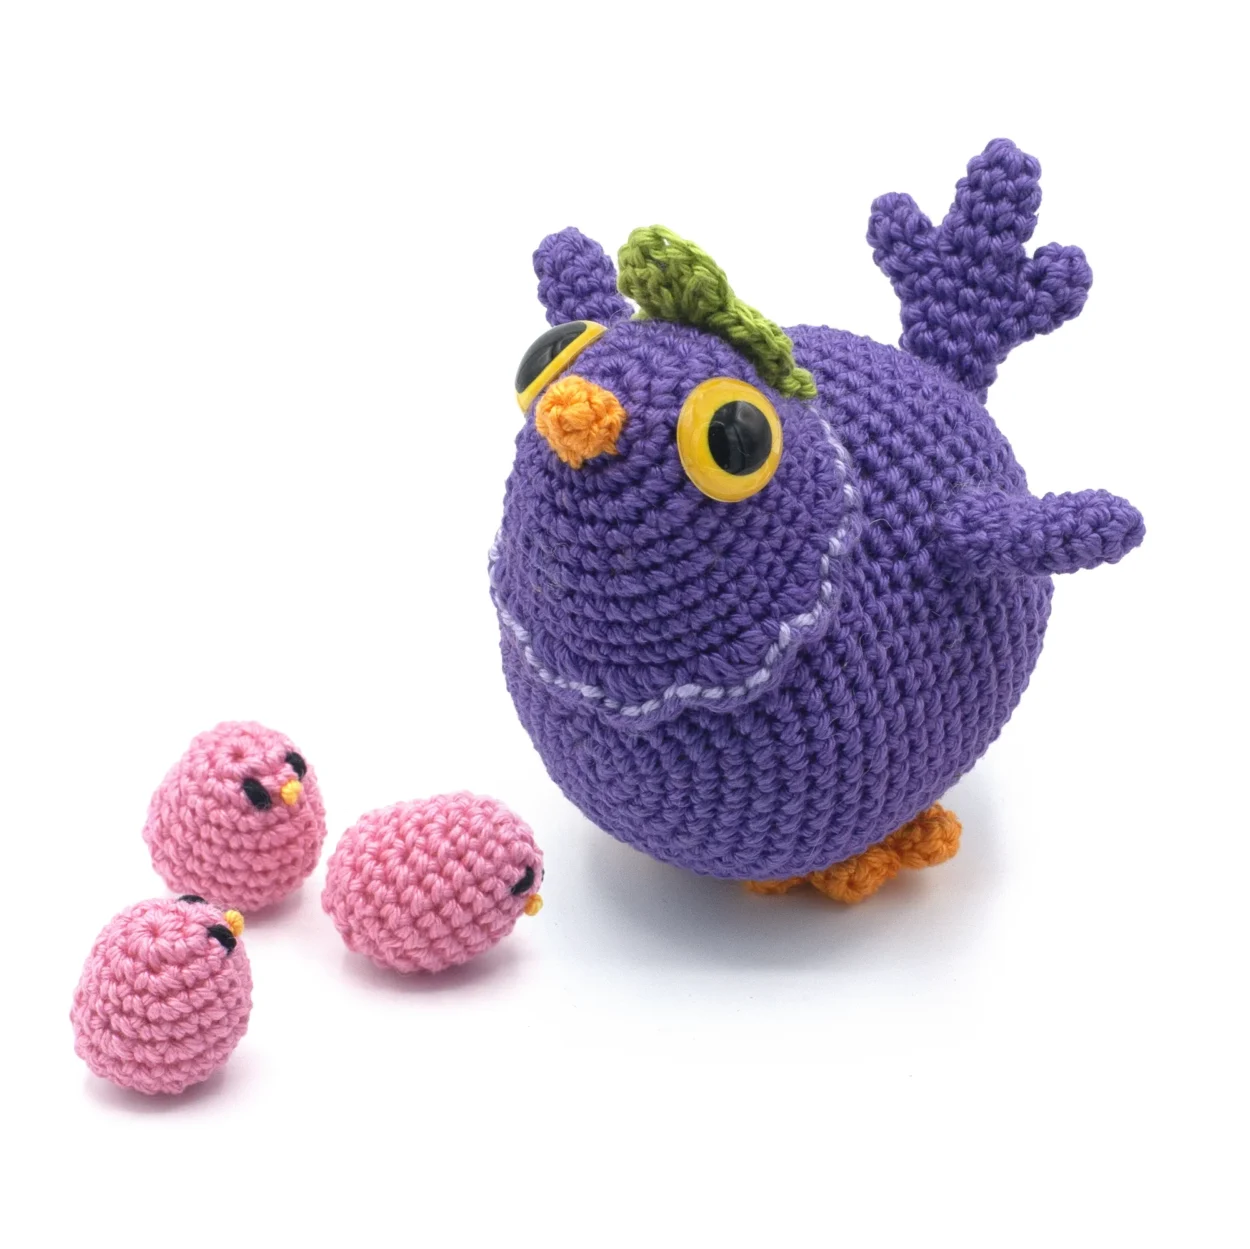
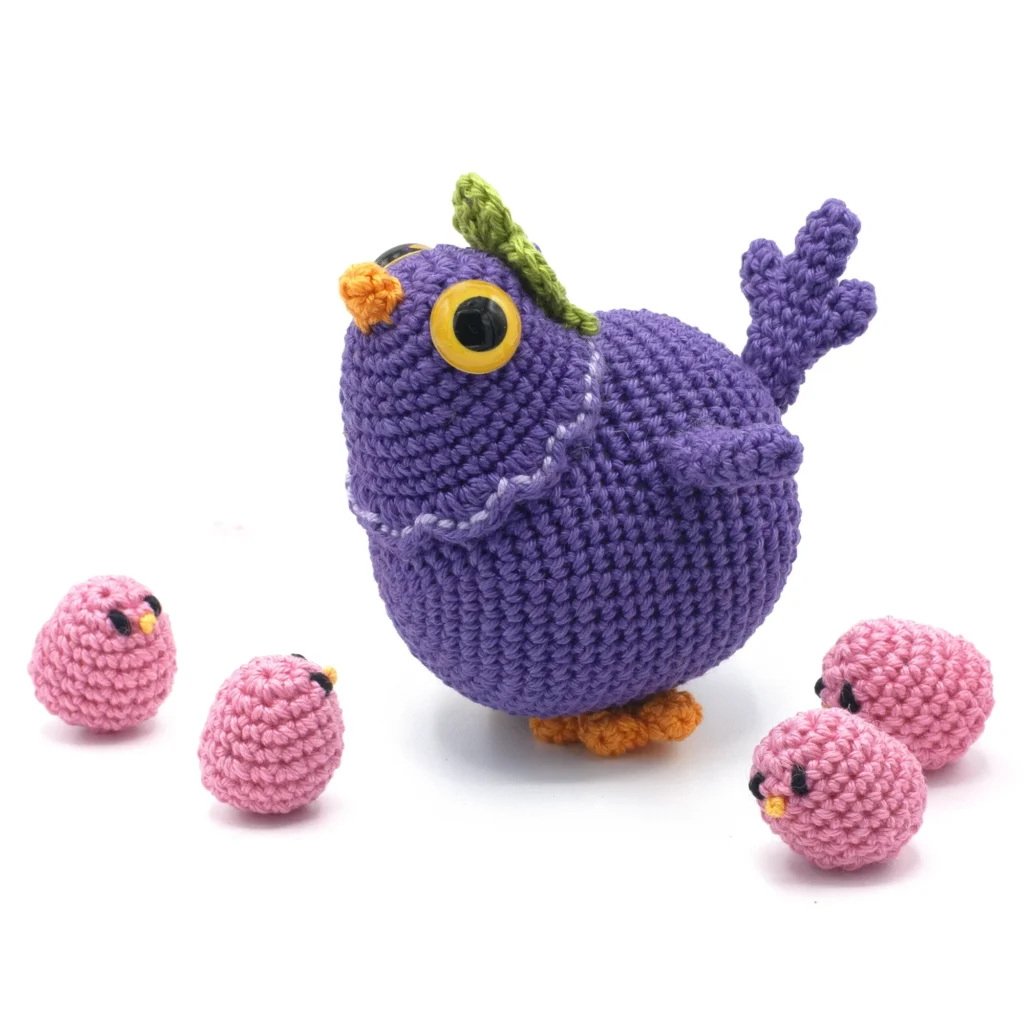
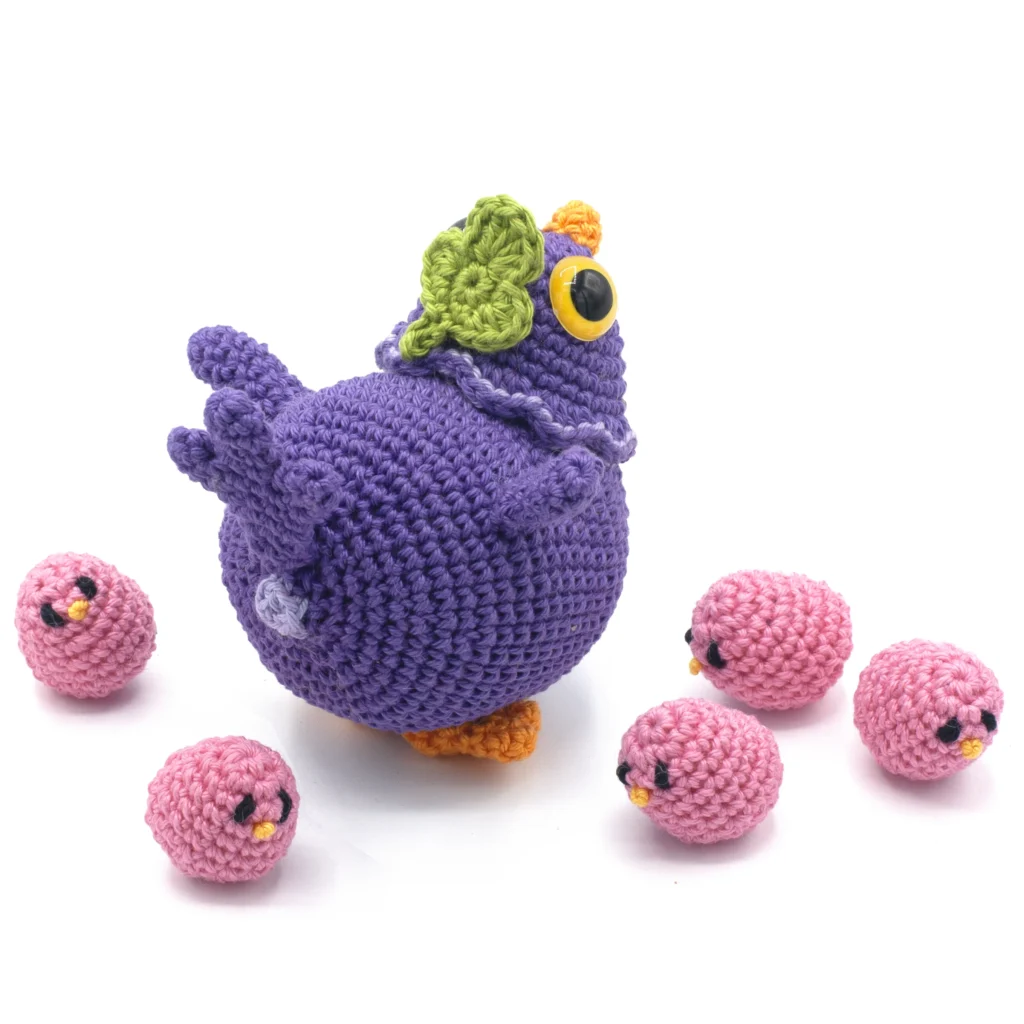
Crochet your own Moonlight Peaks amigurumi toy with this free Cheeken crochet pattern. This cute and colorful character is from the awesome vampire game Moonlight Peaks. Cheeken was made with sport-weight cotton yarn, but you can use any yarn you like to create this adorable chicken-like creature.
Size of Cheeken (when made with sport weight cotton yarn): 4 inch / 10 cm
You can find more Moonlight Peaks crochet Pattern on my blog.
A little story about Cheeken:
A lively farm animal of Moonlight Peaks, the Cheeken is known for its chatter and delicious eggs. It’s always losing count of its cheeklets or musing on the origins of the egg, providing endless barnyard amusement.
Watch this short video that shows you the crocheted Cheeken from all sides!
Table of contents
PDF Pattern
PDF Pattern:
If you prefer a pdf download or want to support me, you can buy the pdf pattern in my etsy shop, thank you so much for your support! (Keep scrolling for the free pattern)
Game:
Add the Game Moonlight Peaks on your steam wishlist.
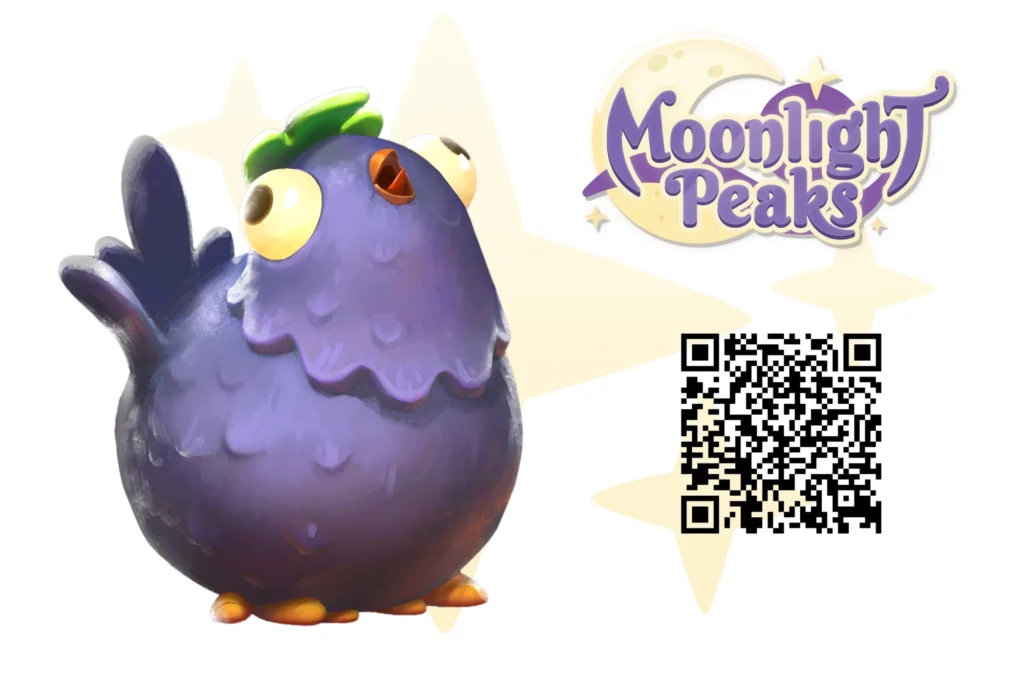
Moonlight Peaks:
This super awesome game will be released in 2026. My husband, Yannis Bolman, and his company, Little Chicken, are creating Moonlight Peaks, and he asked me to crochet amigurumi patterns based on the cute characters from it. This is the first one I’ve made—more to come!
Experience life as a vampire in Moonlight Peaks! Master the art of potion-making and spell-casting, tend to your supernatural farm, and make your mark on the magical town. Befriend the local werewolves, witches and mermaids, and maybe even find eternal love along the way!

Basic Stitches Tutorial:
If you are a beginner that want to learn how to crochet, check out my beginner-friendly basic stitches tutorial, it has many instructional videos on how to crochet every stitch. It shows you all you need to know to make your very own cute toad Amigurumi with this free Yabbis the Magic Toad crochet pattern from Moonlight Peaks.
Materials that you need:
These are the materials that I used. However, feel free to replace the yarn with other yarn of your choice. If you would like to create a smaller of bigger version of this cute free Vampster crochet pattern from Moonlight Peaks, you can simply use a thicker or thinner yarn and crochet hook.
Cotton Sport Weight version 8 cm / 3 inch:
– Yarn and Colors Must Have Purple cotton color: 053
– Yarn and Colors Must Have Lilac cotton color: 052
– Yarn and Colors Must Have Orange cotton color: 106
– Yarn and Colors Must Have Green cotton color: 083
– Yarn and Colors Must Have Pink cotton color: 038
– Yarn and Colors Must Have Yellow cotton color: 014
– Synthetic Poly Filling
– Yellow Safety eyes 1 pair: 15 cm
Search for a similar cotton yarn you can buy near you on YARNSUB
Supplies:
– Crochet hook size 2.5 mm
– Scissors
– Tapestry needles with blunt point, nr. 16 or 17
– Pins
TIP: Are you using are using Blanket yarn? Then I recommend a 8.0 mm crochet hook.
For Super Bulky Chenille yarn I recommend a 5 mm crochet hook, for bulky velvet yarn a 3.5 mm crochet hook.
Abbreviations (U.S Terms) used in this cute crochet pattern:
(All abbreviations are explained in my basic stitches tutorial)
Rnd: Round
st: stitch
sc: single crochet
sl st: slip stitch
dec: decrease
inc: increase
hdc: half double crochet
dc: double crochet
ch: chain stitch
Free Cheeken crochet pattern
Body:
- Use purple yarn
- Rnd 1: start 6 sc in a magic ring (6)
- Rnd 2: inc in all 6 st (12)
- Rnd 3: (sc in next st, inc in next st) repeat 6 times (18)
- Rnd 4: (sc in next 2 st, inc in next st) repeat 6 times (24)
- Rnd 5: (sc in next 3 st, inc in next st) repeat 6 times (30)
- Rnd 6: (sc in next 4 st, inc in next st) repeat 6 times (36)
- Rnd 7: (sc in next 5 st, inc in next st) repeat 6 times (42)
- Rnd 8: (sc in next 6 st, inc in next st) repeat 6 times (48)
- Mark the 18th & 32th stitch of round 9 with a piece of leftover yarn or stitchmarkers, so you know where to place the head.
- Rnd 9-11: sc in all 48 st (48)
- Rnd 12: sc in next 16 st, dec, sc in next 5 st, dec, sc in next 5 st, dec, sc in next 16 st (45)
- Rnd 13: sc in next 17 st, dec, sc in next st, dec, sc in next st, dec, sc in next st, dec, sc in next 17 st (41)
- Rnd 14: sc in all 41 st (41)
- Rnd 15: sc in next 17 st, inc in next st, sc in next st, inc in next st, sc in next st, inc, sc in next st, inc in next st, sc in next 17 st (45)
- Rnd 16: sc in next 16 st, inc in next st, sc in next 5 st, inc in next st, sc in next 5 st, inc in next st, sc in next 16 st (48)
- Rnd 17- 20: sc in all 48 st (48)
- Rnd 21: (sc in next 6 st, dec) repeat 6 times (42)
- Rnd 22: sc in all 42 st (42)
- Rnd 23: (sc in next 5 st, dec) repeat 6 times (36)
- Rnd 24: (sc in next 4 st, dec) repeat 6 times (30)
- Rnd 25: (sc in next 3 st, dec) repeat 6 times (24)
- Rnd 26: (sc in next 2 st, dec) repeat 6 times (18)
- Stuff the body with fiberfill.
- Rnd 27: (sc in next st, dec) repeat 6 times (12)
- Change to lilac yarn
- You can find a detailed tutorial on how to color change here: https://www.mariskavos.nl/how-to-color-change-in-amigurumi/
- Rnd 28: dec 6 times (6)
- Fasten off, leaving a long yarn tail. Using your yarn needle, weave the yarn tail through the front loop of each remaining stitch and pull it tight to close. Weave in the yarn end.
Head:
- Use purple yarn
- Rnd 1: start 6 sc in a magic ring (6)
- Rnd 2: inc in all 6 st (12)
- Rnd 3: (sc in next st, inc in next st) repeat 6 times (18)
- Rnd 4: (sc in next 2 st, inc in next st) repeat 6 times (24)
- Mark the 3rd and 20th stitch of round 5, so you know where to place the eyes.
- Rnd 5: sc in next 4 st, inc in next st, sc in next 3 st, inc in next st, sc in next 3 st, inc in next st, sc in next 11 st (27)
- Rnd 6: sc in all 27 st (27)
- Rnd 7: sc in next 6 st, (inc in next st, sc in next 1 st) repeat 4 times, inc in next st, sc in next 4 st, dec, sc in next st, dec, sc in next st, dec (29)
- Rnd 8: sc in next 5 st, inc in next st, sc in next 14 st, inc in next st, sc in next 8 st (31)
- Rnd 9-10: sc in all 31 st (31)
- Rnd 11: (slst in next st, 2 hdc in next 2 st) repeat 10 st, slst in next st (50)
- Fasten off, leaving a long yarn tail.
- Attach the safety eyes between rounds 5 and 6, in the stitches marked earlier.
- Watch my video on how to attach safety eyes easily: https://youtu.be/-eggN6savXE
A very helpfull video for this free cheeken crochet pattern, but also for all your other Amigurumi. - Embroider a line with lilac yarn on round 11 (photo 1&2)
- Stuff the head with fiberfill while sewing it on the body.
- Sew the head between rounds 3 and 16 of the body, between the markers placed in round 9 of the body. Place the head over the bump.
Foot 2x:
Start making 3 toes
- Use Orange yarn
- Rnd 1: start 4 sc in a magic ring (4)
- Rnd 2: sc in all 4 st (4)
- Fasten off with a slst on first and second toes. Don’t fasten off on the third toe. In the next round, we’ll join the toes together to make the foot.
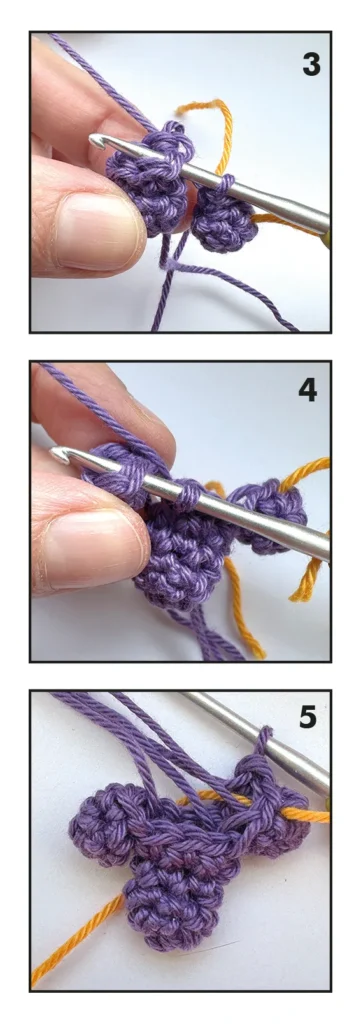
Joining the toes
- In the next round we’ll join the toes by crocheting a single round around all pieces. You jump from one toe to the next by inserting your hook in a stitch of the next piece and pulling up a loop.
- Rnd 3: sc in the next 2 st on the third toe, sc in next 2 st on the second toe (photo 3), sc in next 4 st on the first toe (photo 4), sc in next 2 st on the second toe, sc in next 2 st on the third toe (12) (photo 5)
- Rnd 4: (sc in next 2 st, dec) repeat 3 times (9)
- Rnd 5: sc in all 9 st (9)
- Rnd 6: (sc in next st, dec) repeat 3 times (6)
- Fasten off with a slst, leaving a yarn tail.
- Sew the feet on the bottom of the body between round 11 and 17.
Wing 2x:
- Use purple yarn
- Rnd 1: start 6 sc in a magic ring (6)
- Rnd 2: sc in next 5 st, inc in next st (7)
- Rnd 3-5: sc in all 7 st (7)
- Rnd 6: sc in next 5 st, dec (6)
- Rnd 7: sc in all 6 st (6)
- Fasten off with a slst, leaving a yarn tail.
- Sew the wings on the body between rounds 16 and 19 with in interspace of 13 st between both wings.
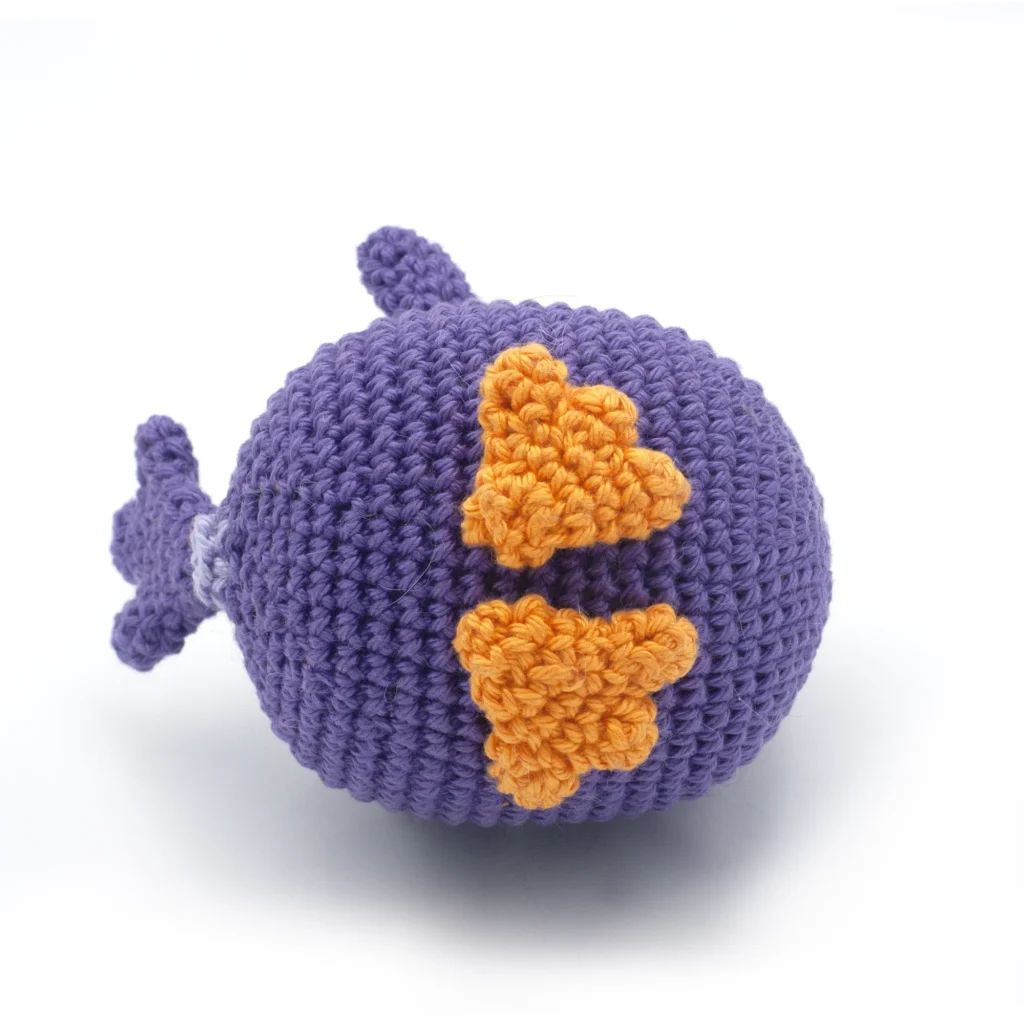
Tail Feather:
Start making 3 feather parts
Big Feather:
- Use purple yarn
- Rnd 1: start 6 sc in a magic ring (6)
- Rnd 2-4: sc in all 6 st (6)
- Fasten off with a slst.
Small Feather 2x:
- Use purple yarn
- Rnd 1: start 4 sc in a magic ring (4)
- Rnd 2: sc in all 4 st (4)
- Fasten off with a slst on first small feather. Don’t fasten off on the second small feather.
- In the next round, we’ll join the feathers together to make the tail feather.
Joining the feather parts
- In the next round we’ll join the feathers by crocheting a single round around all pieces. You jump from one feather to the next by inserting your hook in a stitch of the next piece and pulling up a loop.
- Rnd 3: sc in the next 2 st on the second small feather part, sc in next 3 st on the big feather part, sc in next 4 st on the first small feather part, sc in next 3 st on the big feather part, sc in next 2 st on the second feather part (14)
- Rnd 4: (sc in next 5 st, dec) repeat 2 times (12)
- Rnd 5: (sc in next 2 st, dec) repeat 3 times (9)
- Rnd 6: sc in all 9 st (9)
- Rnd 7: (sc in next st, dec) repeat 3 times (6)
- Fasten off with a slst, leaving a yarn tail.
- Sew the feather on the body, above the last round of the body.
Beak:
- Use yellow yarn
- Rnd 1: start 4 sc in a magic ring (4)
- Rnd 2: (sc in next st, inc in next st) repeat 2 times (6)
- Fasten off with a slst, leaving a yarn tail.
- Sew the beak between the eyes.
Leaf:
- Use green yarn
- Rnd 1: start 8 sc in a magic ring (8)
- Rnd 2: sc in next st, 2 sc in next st, 4 hdc in next st, slst in next st, hdc + 2 dc + trc + 2 dc + hdc in next st, slst in next st, 4 hdc in next st, 2 sc in next st (22)
- Rnd 3: slst in next st, chain 3, turn, start in second chain from hook, slst in next 2 ch stitches, slst in the 2nd stitch of round 2 (4)
- Fasten off, leaving a yarn tail.
- Sew the leaf on the head

Baby Cheekens:
- Use pink yarn
- Rnd 1: start 6 sc in a magic ring (6)
- Rnd 2: inc in all 6 st (12)
- Rnd 3: sc in all 12 st (12)
- Rnd 4: (sc in next 3 st, inc in next st) repeat 3 times (15)
- Rnd 5: sc in all 15 st (15)
- Rnd 6: sc in next 9 st, (sc in next st, inc in next st) repeat 3 times (18)
- Rnd 7-8: sc in all 18 st (18)
- Stuff the body with fiberfill.
- Rnd 9: (sc in next st, dec) repeat 6 times (12)
- Rnd 10: dec 6 times (6)
- Fasten off, leaving a long yarn tail. Using your yarn needle, weave the yarn tail through the front loop of each remaining stitch and pull it tight to close. Weave in the yarn end.
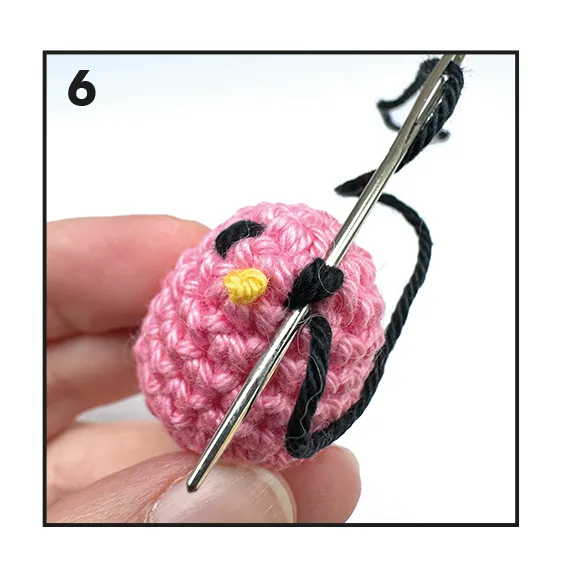
- With black yarn embroider two eyes over round 3 (photo 6), with 2 stitches between both eyes. To make the beak, embroider a french knot (see illustration) between rounds 3 and 4.
Now your cheeken is done! I hope you enjoyed this free cheecken crochet pattern. Please subscribe to my newsletter to be updated on future Moonlight Peaks patterns.
Cheeken and Moonlight Peaks are copyrighted by Little Chicken Game Company, this pattern has been made with the permission of Little Chicken Game Company.
