
Free Flamingo Crochet Pattern


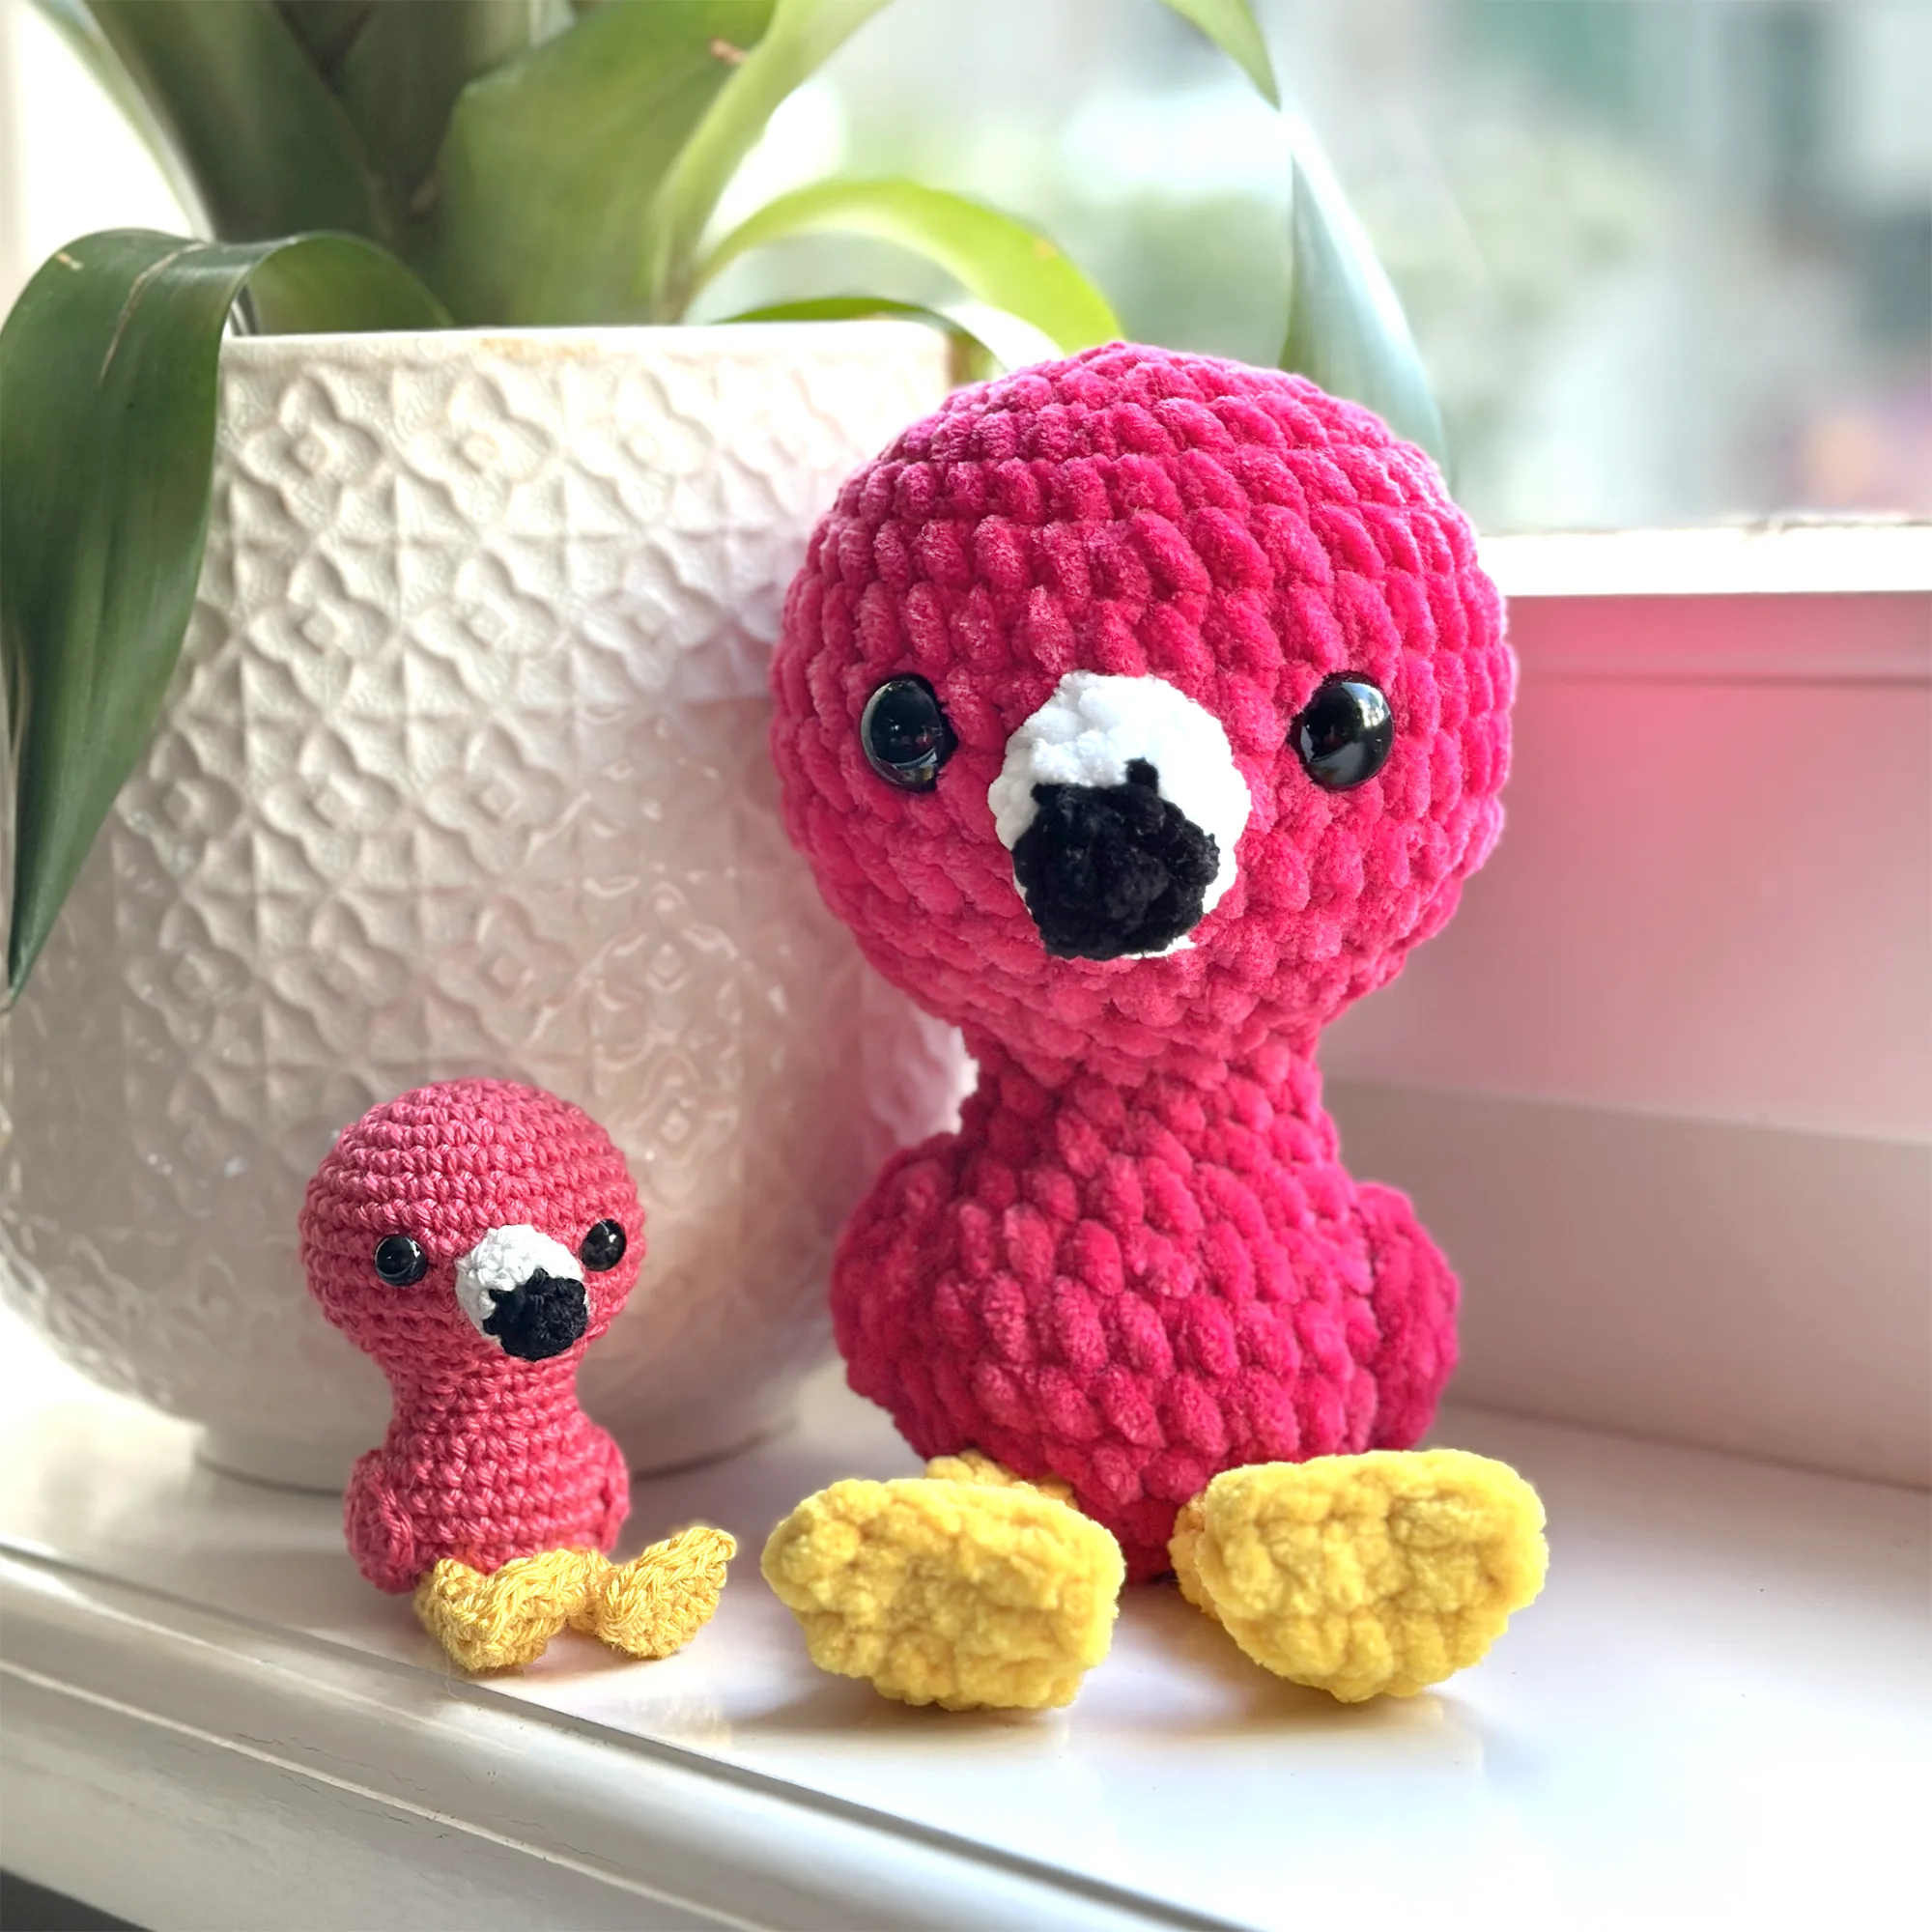
Vicky the Flamingo
This free flamingo crochet pattern is perfect for beginners and includes a full step-by-step video tutorial so you can easily make your own cute flamingo amigurumi. The pattern is written in U.S. crochet terms and can be made with any yarn type, making it great for both new and experienced crocheters.
I love designing mini amigurumi animals, and this little flamingo is quick to make—perfect as a handmade gift or fun weekend project. On my blog, you’ll also find many more mini crochet patterns with matching video tutorials.
The small flamingo was made using sport-weight cotton yarn, while the larger plush flamingo was made with super bulky chenille yarn. Both sizes use the exact same pattern, so feel free to choose any yarn you like to create your own adorable crochet flamingo!
Table of contents

Video Tutorial
I also have made a full video on YouTube on how to crochet every step of vicky the Flamingo Amigurumi:

PDF Pattern Flamingo Crochet Pattern
PDF Pattern without ads:
If you prefer a pdf download or want to support me, you can buy the pdf pattern in my etsy shop, thank you so much for your support! (Keep scrolling for the free pattern)
Basic Stitches Tutorial
If you’re new to crocheting, don’t worry! Check out my beginner-friendly basic stitches tutorial, complete with numerous instructional videos. It covers everything you need to know to make your very own adorable Amigurumi.
Materials
These are the materials that I used. However, feel free to replace them with other materials of your choice. Furthermore, if you wish to crochet a larger or smaller version of this toy plushie using this free flamingo amigurumi pattern, you can simply use a thicker or thinner yarn and crochet hook.
Cotton Sport Weight version 7 cm / 3 inch:
– Yarn and Colors Must Have Pink cotton color: 035 – 15 gram
– Yarn and Colors Must Have Yellow cotton color: 014 – 5 gram
– Yarn and Colors Must Have Black cotton color: 100 – 2 gram
– Yarn and Colors Must Have white cotton color: 001 – 2 gram
– Synthetic Poly Filling
– Crochet hook size B/1 (2.5 mm)
– Safety eyes 1 pair: 7 mm
Chenille Super Bulky version 16 cm / 6 inch:
– Pink, Yellow, Black and White Chenille yarn
– Synthetic Poly Filling
– Crochet hook size H/8 (5.0 mm)
– Safety eyes 1 pair: 15 mm
Search for a similar chenille yarn you can buy near you on YARNSUB

Supplies:
– Scissors
– Tapestry needles with blunt point, nr. 16 or 17
– Pins
TIP: Are you using are using Blanket yarn? Then I recommend a L/11 (8 mm) crochet hook.
Abbreviations
Abbreviations used in this cute crochet pattern:
(All abbreviations are explained in my basic stitches tutorial)
Rnd: Round
st: stitch
sc: single crochet
sl st: slip stitch
dec: decrease
inc: increase

TIP: Before starting this flamingo plushie crochet pattern, beginners should remember that there is a full video tutorial on how to make this flamingo: https://youtu.be/EBsSgnPkoSY
Free Flamingo Crochet Pattern
Body:
- Use pink yarn
- Rnd 1: start 8 sc in a magic ring (8)
- Rnd 2: inc 8 times (16)
- Rnd 3: (sc, inc in next st) repeat 8 times (24)
- Rnd 4: (sc in next 3 st, inc in next st) repeat 6 times (30)
- Rnd 5: sc in all 30 st (30)
- Rnd 6: (sc in next 4 st, inc in next st) repeat 6 times (36)
- Mark the the 8th & 15th stitch of round 8 with a piece of yarn
- Rnd 7-9: sc in all 36 st (36)
- Rnd 10: (sc in next 4 st, dec) repeat 6 times (30)
- Rnd 11: (sc in next 3 st, dec) repeat 6 times (24)
- Insert the safety eyes between rounds 8 and 9, in the stitches marked earlier.
- Tip: When crocheting the tail, it might look like the eyes are not placed correctly, but this should be fine once the tail has been stuffed.
- Rnd 12: (sc in next 2 st, dec) repeat 6 times (18)
- Rnd 13: (sc in next 1 st, dec) repeat 6 times (12)
- Rnd 14-16: sc in all 12 st (12)
- Rnd 17: slst in next st, ch 4 (photo 1), start in second ch from hook (photo 2), sc in next 3 ch, start in the sc where you made the slst (photo 3), (sc in next st, inc in next st) repeat 6 times (24: 21 + 3ch)
- Watch my full video tutorial if you need more help: https://youtu.be/EBsSgnPkoSY
- Rnd 18: sc in next 3 st, inc in next st, sc in next 7 st, inc in next st, sc in next 4 st, inc in next st, sc in next 7 st (27)
- Rnd 19-20: sc in all 27 st (27)
- Stuff the body with fiberfill and continue stuffing as you go.
- Rnd 21: sc in next st, dec 3 times, sc in next st (sc in next st, dec in next st) repeat 6 times, sc in next st (18)
- Rnd 22: dec, sc in next st, dec, sc in next 13 st (16)
- Rnd 23: dec 8 times (8)
- Fasten off, leaving a yarn tail. Using your yarn needle, weave the yarn tail through the front loop of each remaining stitch and pull it tight to close.
Beak:
- Start in black yarn:
- Rnd 1: start 4 sc in a magic ring (4)
- Rnd 2: sc in next 1 st, inc in next 2 st, sc in next 1 st (6)
- In the next round we are going to change colors. Hide the new yarn behind the last stitches in the first color (photo 4), you change colors in the last stitch (photo 5 & 6) before you start crocheting in the second color. Hide the first color behind a few stitches when crocheting in the second color.
Or watch my video about how to change color.
- Change to white yarn
- Rnd 3: sc in next 2 st, inc in next 2 st, sc in next 2 st (8)
- Rnd 4: sc in all 8 st (8)
- Fasten off with a slst, leaving a long tail for sewing.
- If you want, you can put some stuffing in the beak, when using sport weight cotton yarn it is probably not needed, because the beak is so small.
- Sew the beak between the eyes on rounds 8-10 of your flamingo Amigurumi.
Wings 2x:
- In pink yarn
- Rnd 1: start 6 sc in a magic ring (6)
- Rnd 2: inc 2 times, hdc + dc + hdc in next st, inc 3 times (13)
- Fasten off cleanly. Leaving a long tail for sewing.
- Sew the wings on the side of the body, between rounds 17 and 22.
Leg 2x:
- Use yellow yarn:
- Rnd 1: start 5 sc in a magic ring (5)
- Rnd 2-7: sc in all 5 st (5)
- Rnd 8: inc 5 times (10)
- Rnd 9: sc in all 10 st (10)
- Fasten off with a slst, leaving a long tail for sewing.
- If you want, you can put some stuffing in the legs, when using sport weight cotton yarn it is probably not needed, because the leg is so small.
- Flatten round 9 and sew together (photo 7). Fold the foot up and sew round 7 and 8 together (photo 8&9) to get the foot shape. Sew the legs on round 22 and 23 with an interspace of 2 st.
Now your cute flamingo is finished! I hope you enjoyed making her. There are many more free plushie patterns on my blog, Big and small Amigurumi animals. Most of them with full video tutorial.
