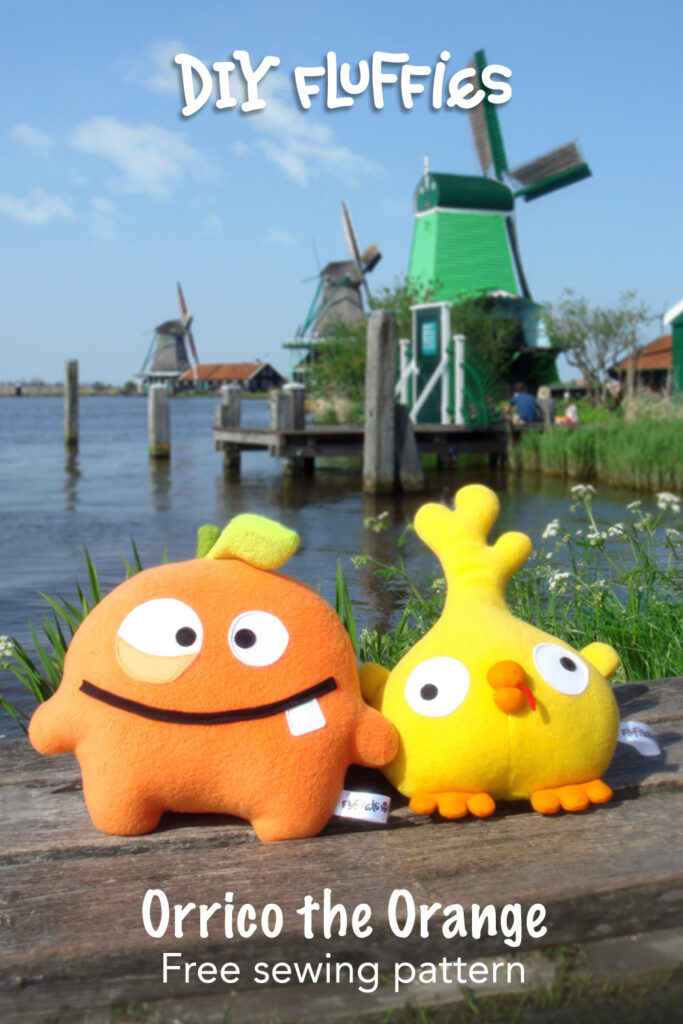

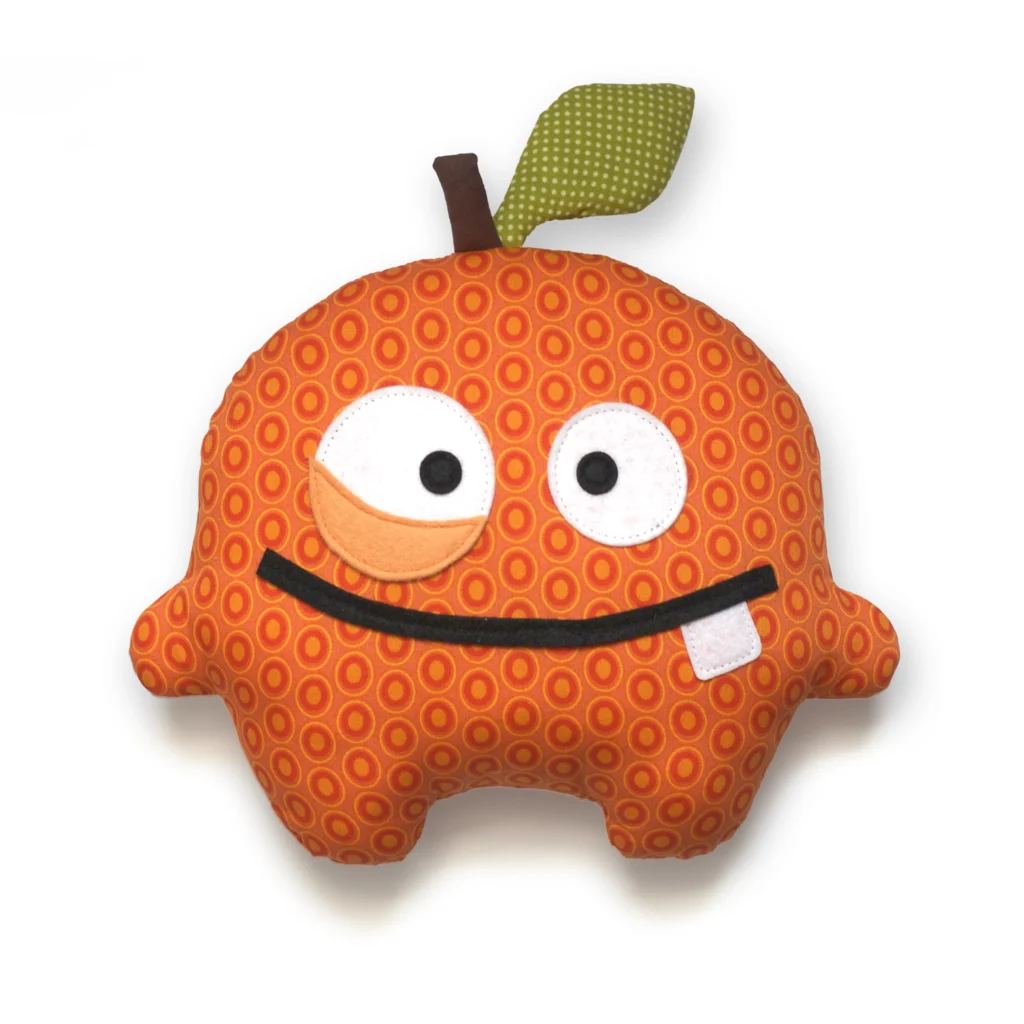
Free Orange Sewing Pattern

Orrico the Orange
Sew your own adorable orange plush with this free orange sewing pattern! This cute fruit plush features a sweet little face and is a fun, beginner-friendly project for anyone who loves making soft toys and kawaii creations. If you enjoy creating cute plush toys, handmade gifts, or fun food-inspired crafts, this orange will make a cheerful addition to your collection.
This easy plush toy sewing pattern is simple to follow and perfect for beginners, using basic sewing techniques to create a soft and cuddly plush. Whether you are looking for a quick DIY stuffed toy project, a fun way to use leftover fabric, or a cute handmade decoration, this orange is a playful and rewarding make.
Perfect for fans of cute plush sewing patterns, food plushies, and beginner-friendly sewing projects, this orange is full of personality and fun to create!
PDF Pattern Orrico the Orange
PDF Pattern:
If you prefer a pdf download or want to support me, you can buy the pdf pattern in my etsy shop, thank you so much for your support! (Keep scrolling for the free pattern)
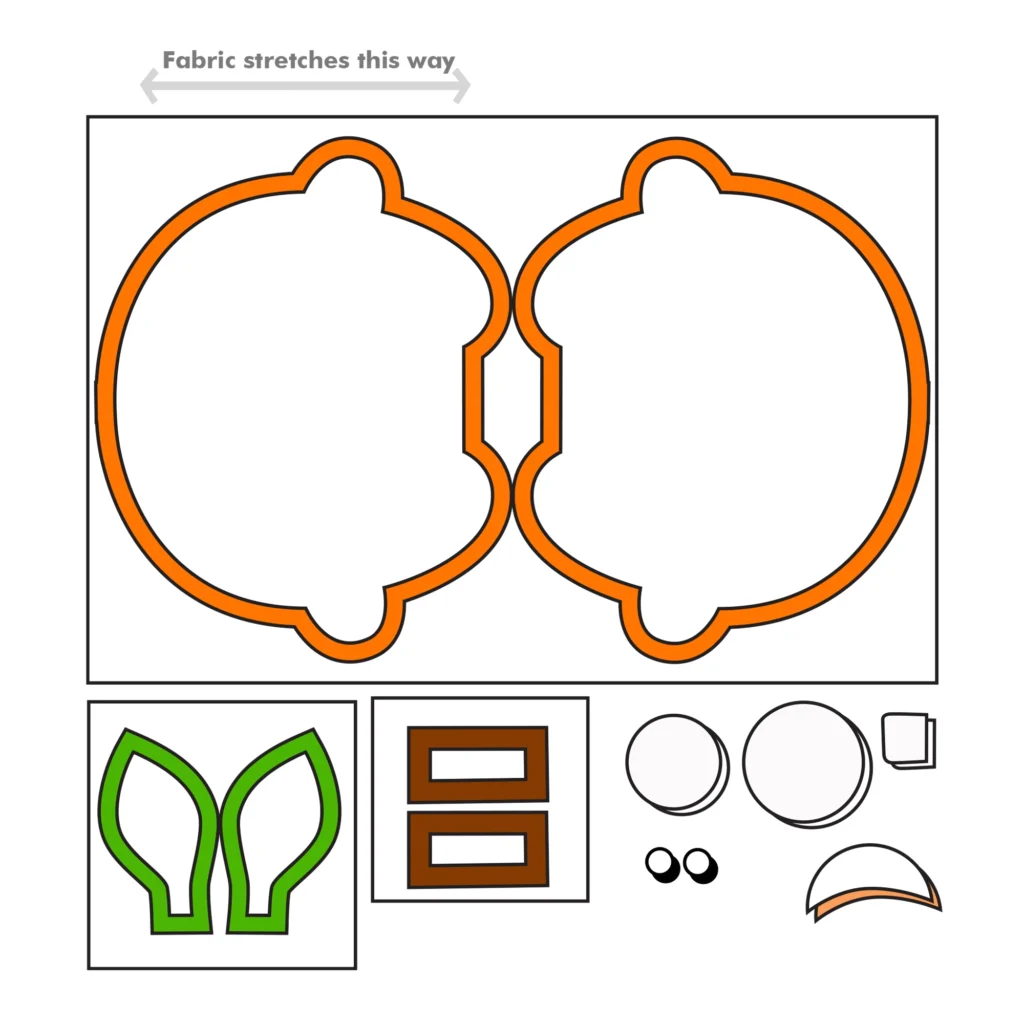
Template:
Materials:
Orange cotton/ fleece or other fabric: 18 x 12 inch / 45 x 30 cm
Green cotton/ fleece or other fabric: 6 x 6 inch / 15 x 15 cm
Brown cotton/ fleece or other fabric: 4 x 4 inch / 10 x 10 cm
Black felt: 2 x 2 inch / 5 x 5 cm
White Felt: 4 x 4 inch / 10 x 10 cm
Orange Felt: 4 x 2 inch / 10 x 5 cm
Fiber Filling
Pins
Scissors
Sewing machine or sewing needle
Thread
Free Orange Sewing Pattern Tutorial:
Print and cut out the above template. Make sure you print at 100%. Do not scale to paper size.
Step 1a:
Draw the Cotton pattern pieces on the backside of the fabric with a pencil or fabric marker, then cut them out with 1 cm / 0.4 inch seam allowance. The pattern is without seam allowance, add the seam allowance after you draw the pattern on the fabric.
The seam allowance doesn’t have to be very precise. Use the drawn pattern lines as your guideline when sewing. When pinning two layers of fabric together stick the pin through the pattern lines, so you know that they are on top of eachother.
Some pieces need to be cut out twice or more, once normal and once mirrored. Please check the illustration for which pieces this needs to be done.
Step 1b:
Cut out the felt parts without seam allowance.
Draw the pattern pieces on the cotton fabric with a 4B or 6B pencil, you do not need a special fabric pencil. You won’t see the pencil through the fabric. When you are using fleece, you can use a marker like sharpies on the fabric, pick a color that is close to the fabric.
Tip: If you do not have any felt, you could also use cotton or other fabric for the face parts. You make applique parts from cotton or other fabric, how you do this is shown in my how to appliqué tutorial.
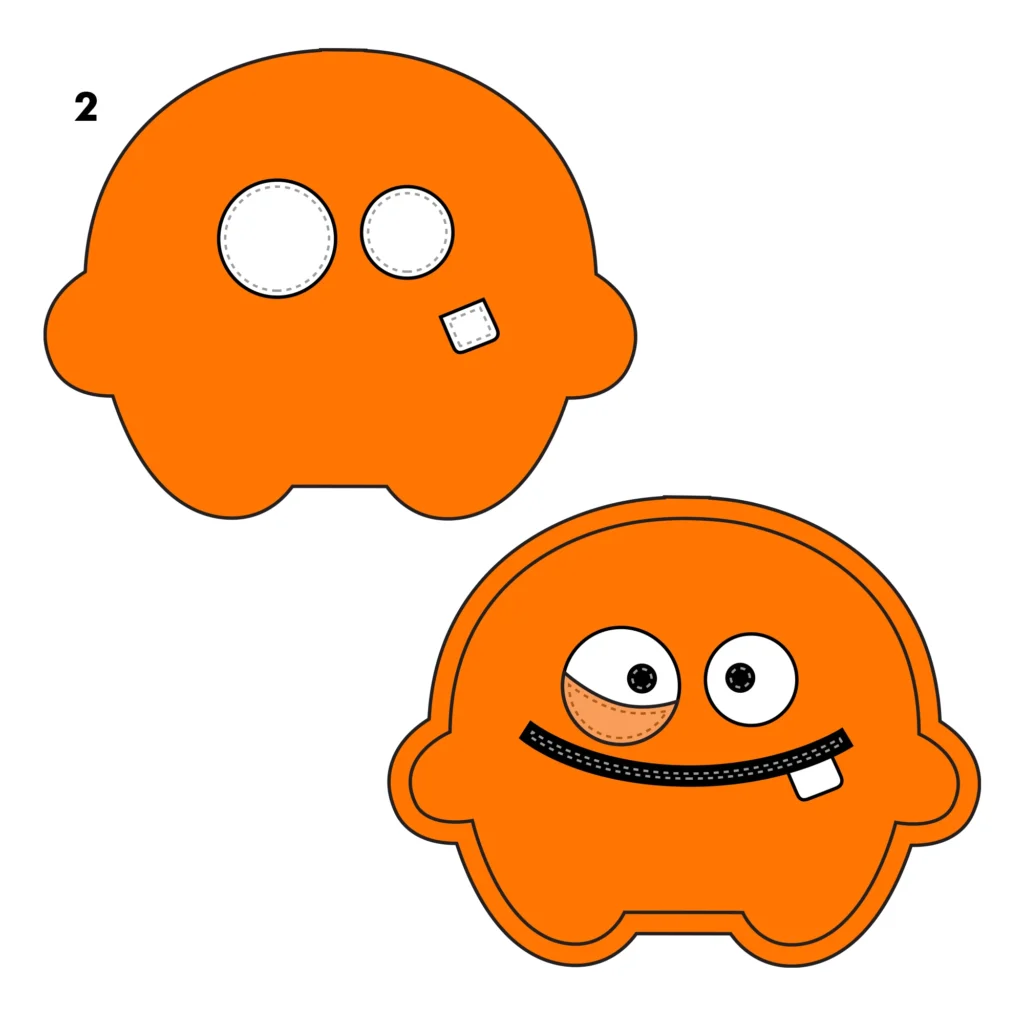
Step 2:
Sew the Eyes and Tooth on the Orange. Then sew on the Pupils, Eyelid and Mouth.
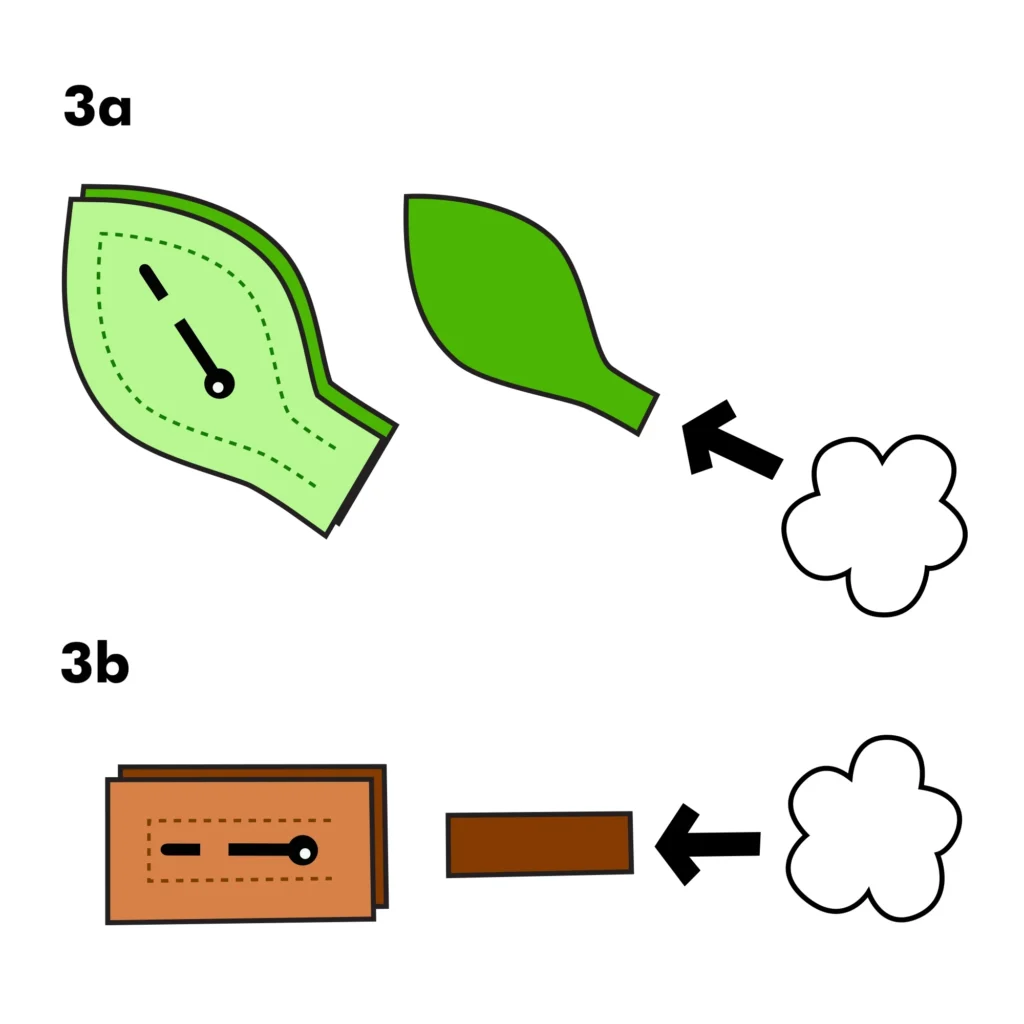
Step 3a:
Put the Leaf parts on top of eachother with the right sides together. Sew the leaf, but leave a hole at the bottom. Trim the seam allowance and turn the leaf right side out. Put a bit of stuffing in the leaf.
Step 3b:
Put the Stem parts on top of eachother with the right sides together. Sew the stem, but leave a hole at the bottom. Trim the seam allowance and turn the stem right side out. Put a bit of stuffing in the stem.
Step 4:
Put the Body with the face and the Body back on top of eachother with the right sides together. Put the Leaf and stem in between the layers.
The stem against the front side of the body. Sew the Body, but leave a hole at the bottom. Trim the seam allowance and turn the Body right side out.
Fill the body with stuffing and hand-sew the hole at the bottom closed. Use a ladder stitch to close the hole invisibly.
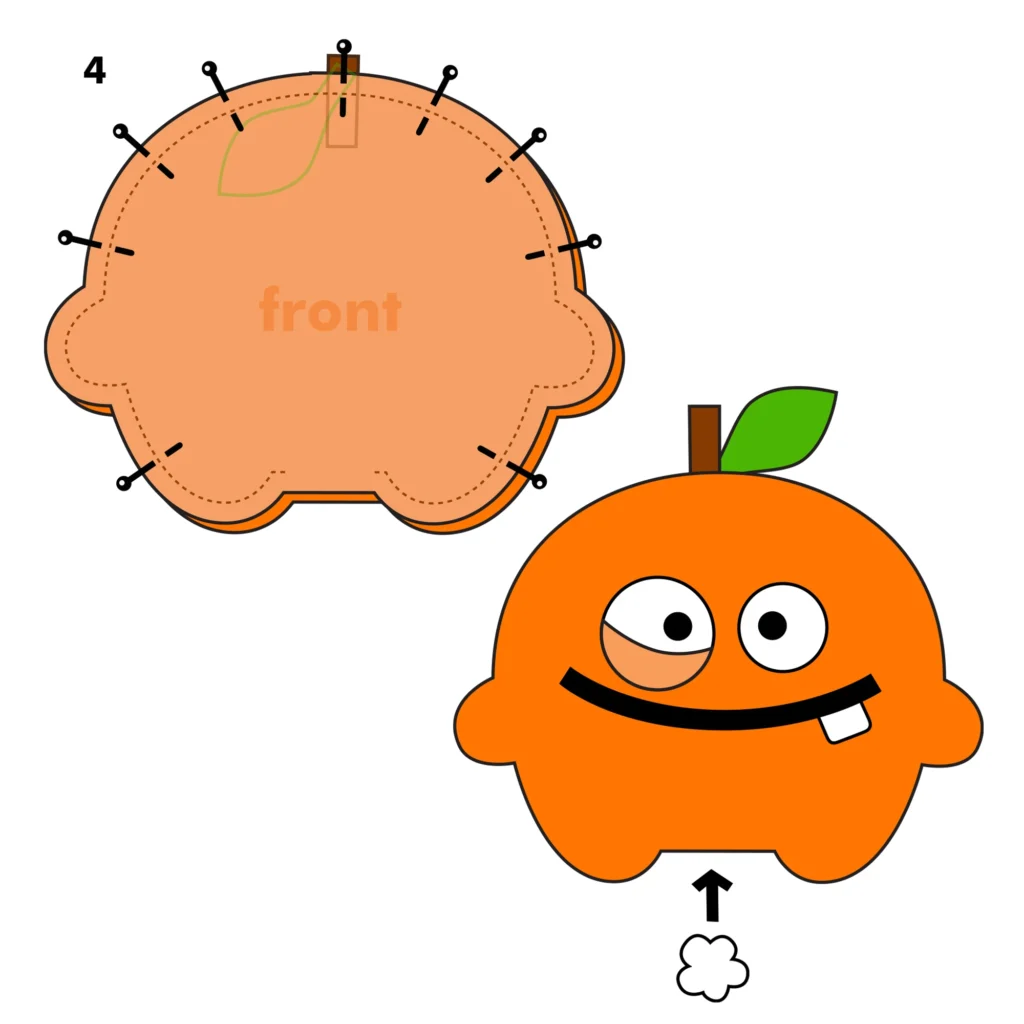
Now Orrico the orange is done! I hope you enjoyed this free orange sewing pattern!