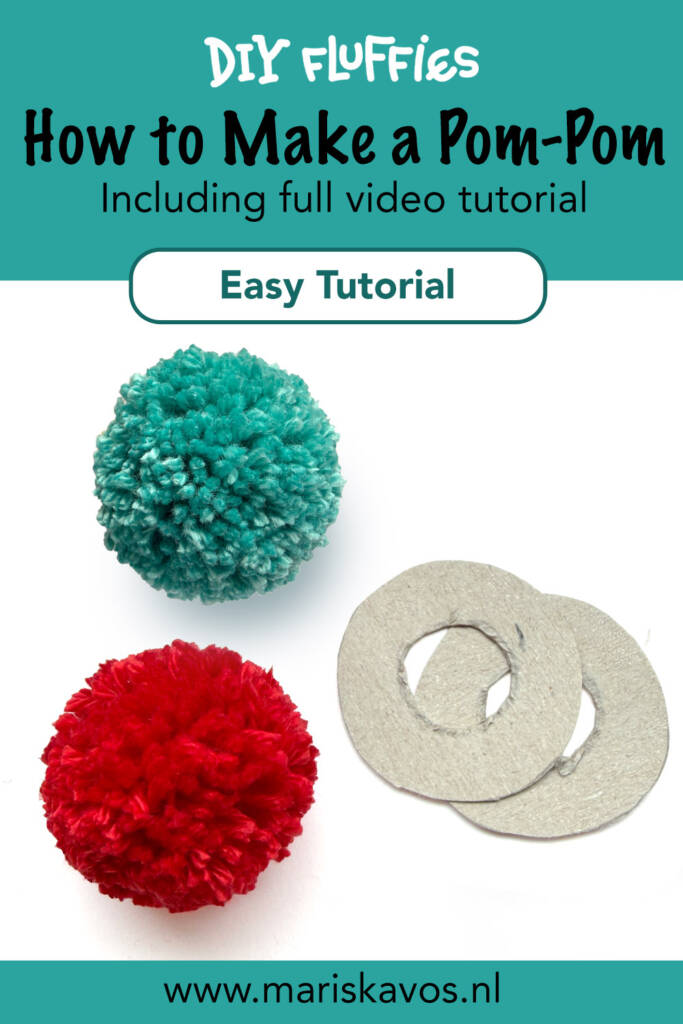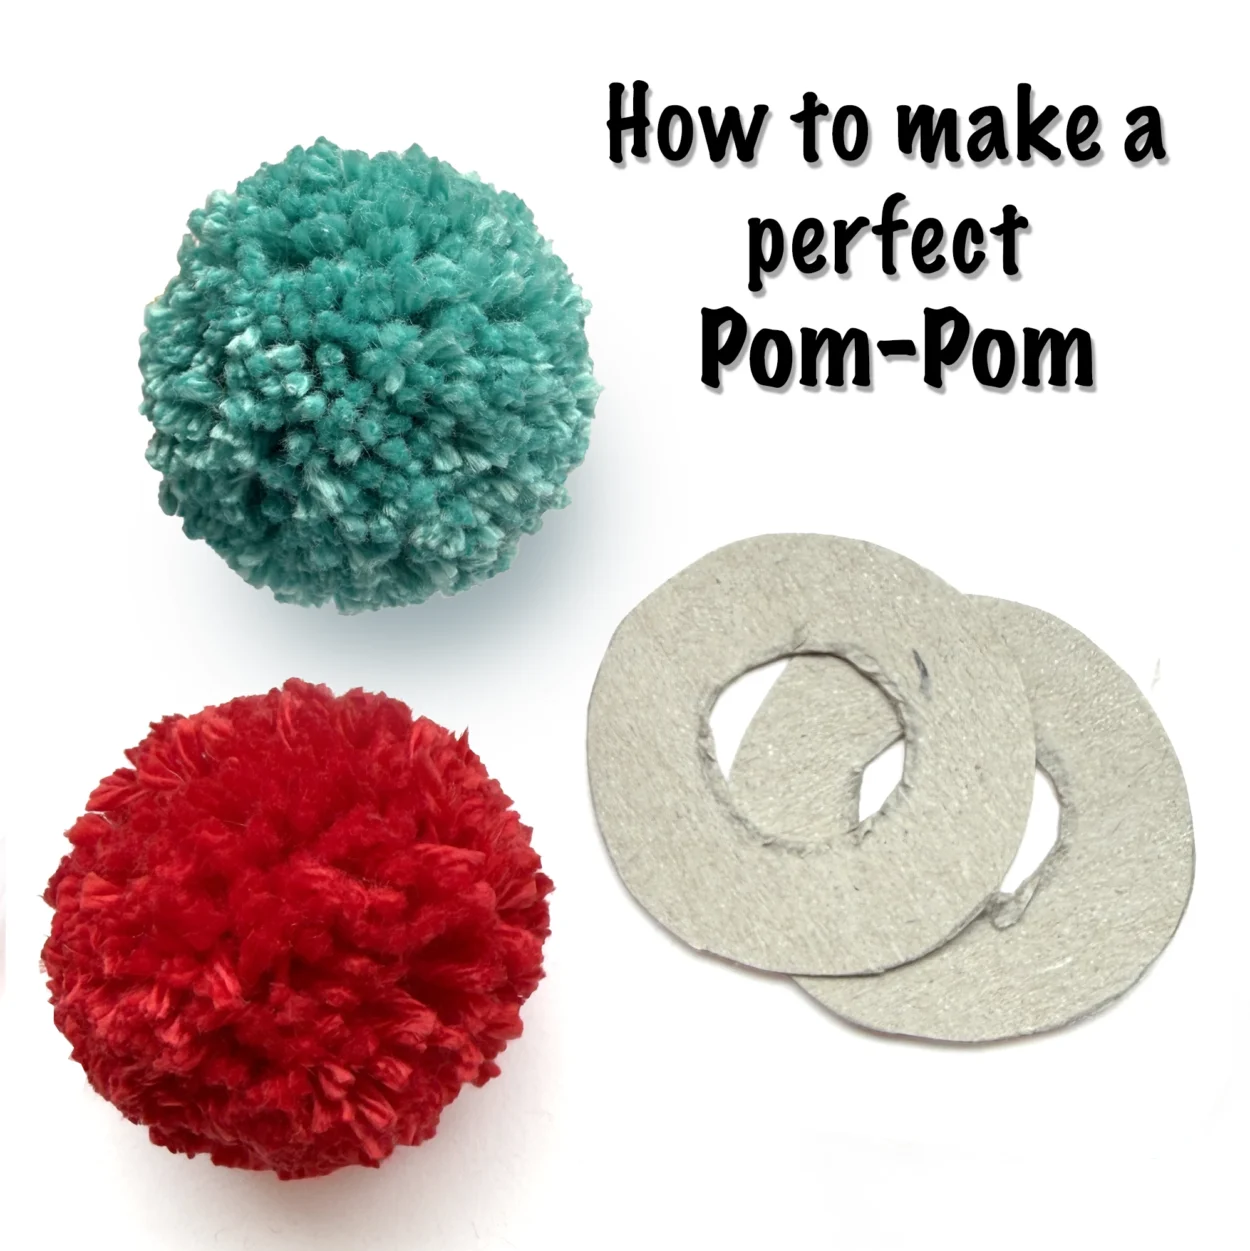


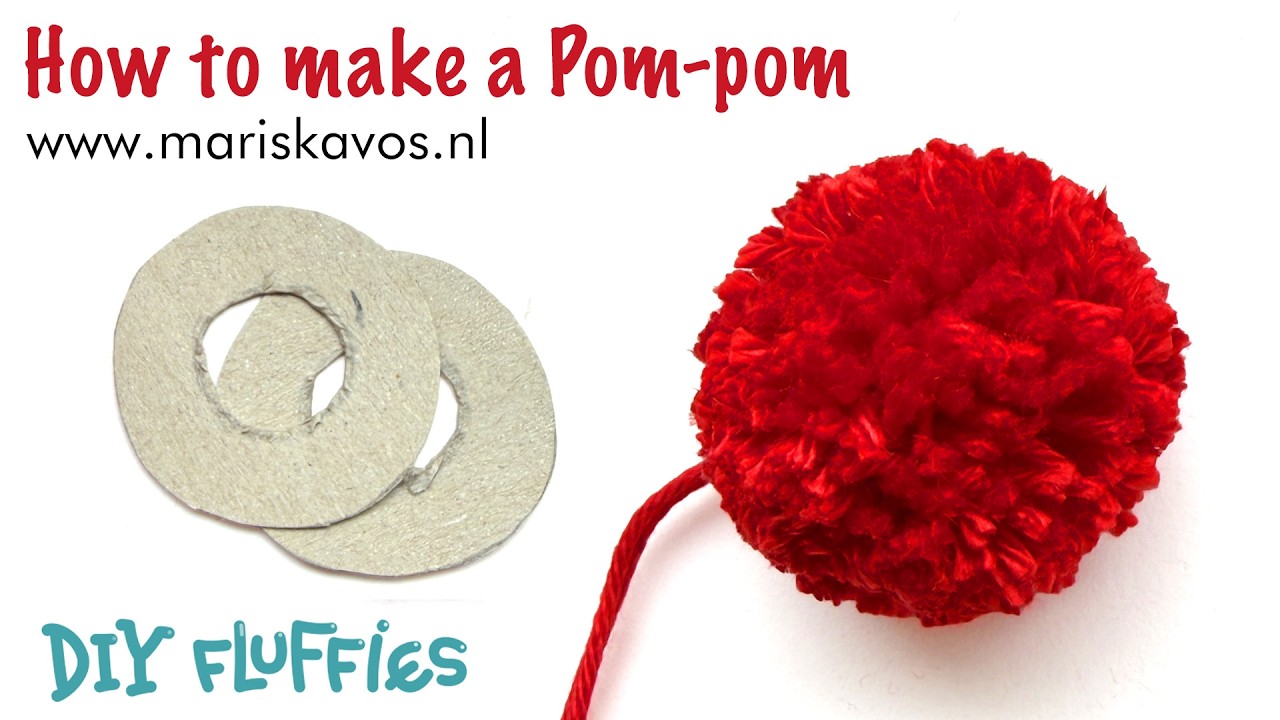
How to Make a Pom-Pom with Yarn and Cardboard
Learn how to make a pom-pom with yarn and cardboard with this easy step-by-step tutorial. Pom-poms are perfect for decorating hats, amigurumi, scarves, and many other crochet projects. This tutorial includes clear step-by-step photos to guide you through the process. If you need extra help, you can also watch my full video tutorial on how to make a pom-pom.
To make things even easier, I created a free downloadable donut template with several different sizes. Of course, you can also make one in any size you like using a pair of compasses. But if you don’t have one at home, this printable template will help you create perfectly shaped pom-poms quickly.
Table of Contents
How to make a pom-pom video
I explain in detail how to create a pompom with cardboard and yarn in this video tutorial:
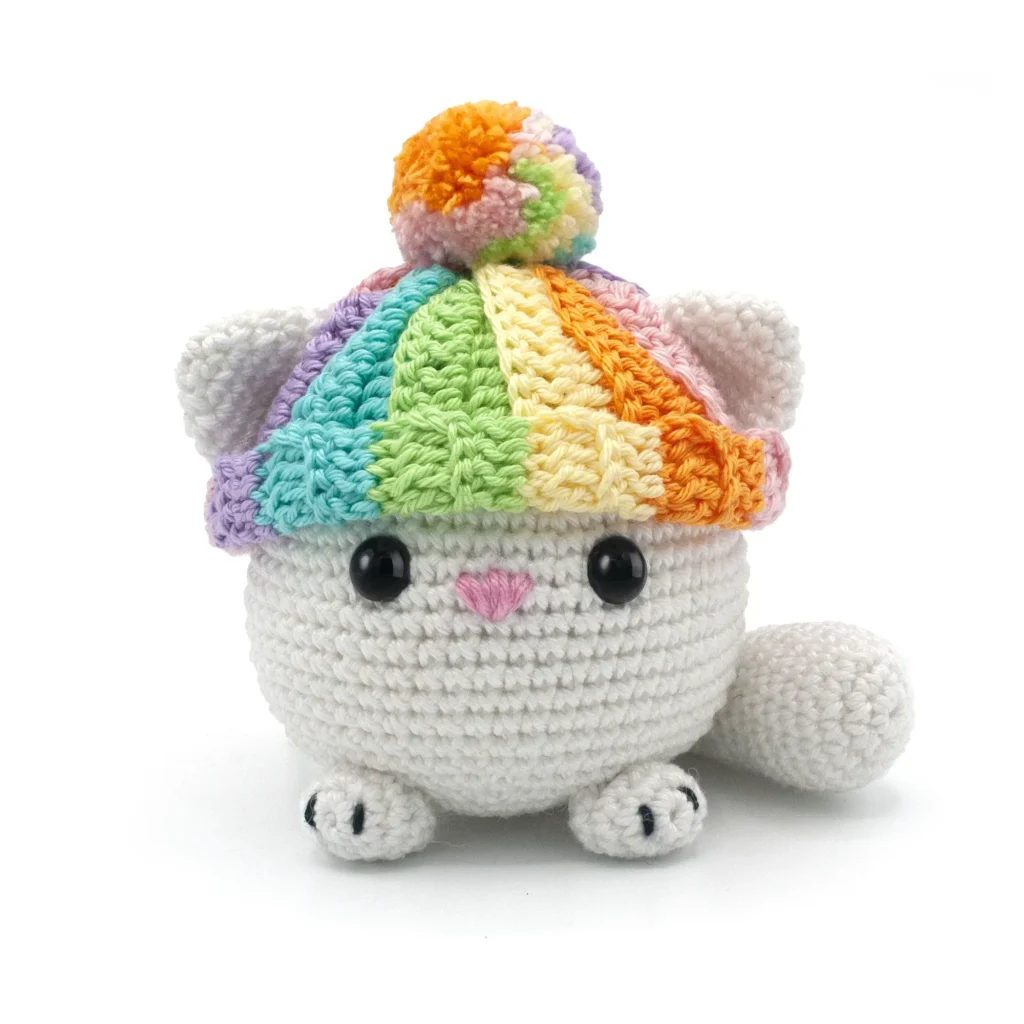
Molly the Cat will be added as a free crochet pattern on my blog in March 2026. The little pom-pom on her hat is made with many colorful strands of yarn, giving it a bright and playful look.
This is an easy crochet pattern that is great for beginners. You might have noticed that there are many free cat patterns on my blog, my own cat Mr. Grumpy inspires me a lot when creating them!
FAQS
Which yarn should I use?
You can use almost any yarn to make a DIY pom-pom, including cotton, acrylic, or wool. These are some of the best yarn types because they hold their shape well and create a full, fluffy result. However, chenille yarn is not recommended because it can fall apart easily.
A simple way to test if your yarn is suitable for is to cut a small piece and see if the fibers stay together. If the yarn starts to shed or fall apart, it may not work well for making pompoms.
I made the blue and red ones with sport weight cotton yarn, a yarn that I have used many times to make amigurumi toys.
How do I make them with thick yarn?
When using thick yarn, make sure that you pull the yarn a little while wrapping it around the donut. This adds some tension. When you cut it, the yarn will relax and make your pompom more dense. Use large, sharp scissors to cut through the thick yarn.
How to make a pom-pom photo tutorial
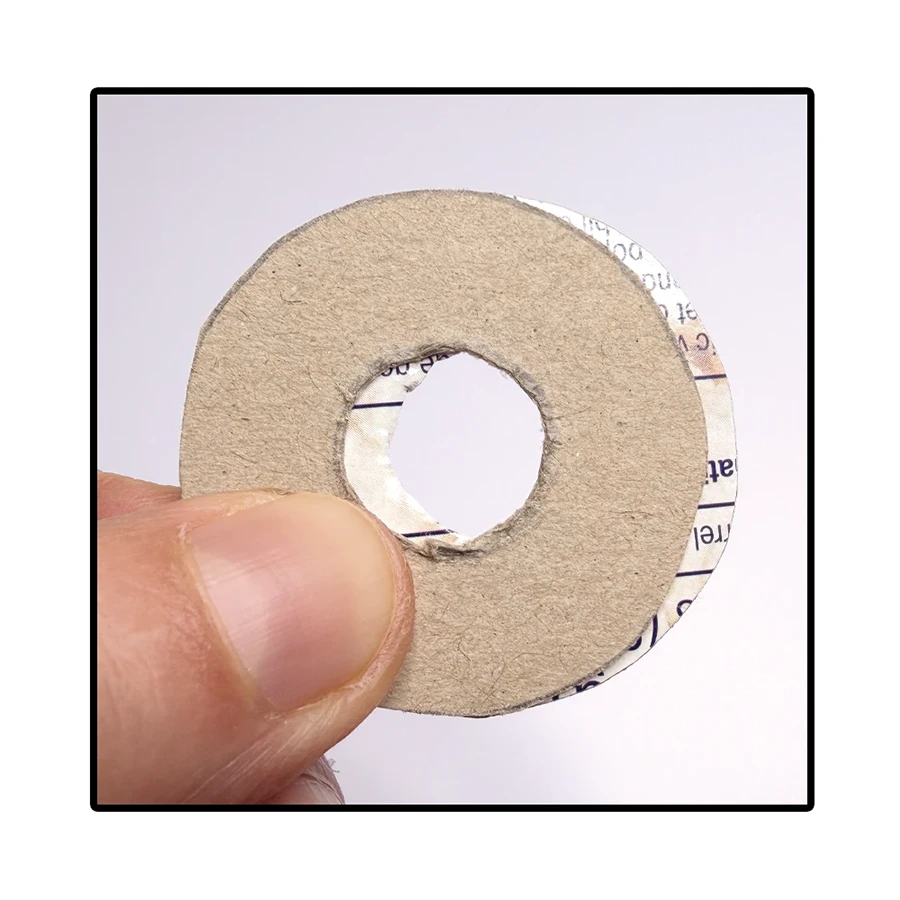
Step 1: Cut out two identical donut-shaped circles from cardboard. You can use a pair of compasses or draw the donuts by hand. Or use my free downloadable template to create two cardboard donuts.
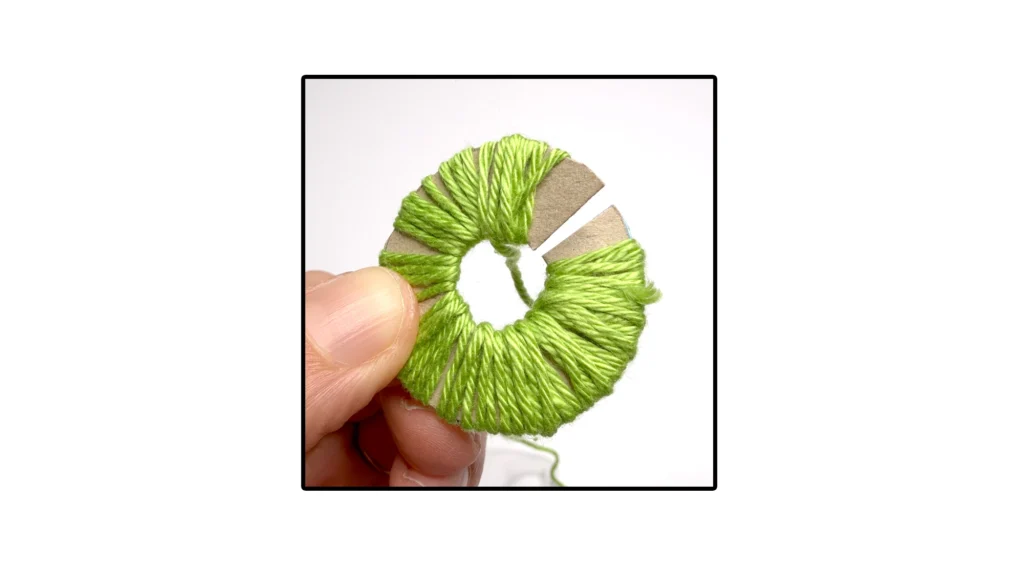
Step 2: Wrap the yarn around the cardboard templates, passing it through the center hole each time, until the donut is completely filled with yarn. The more yarn you wrap around the donut, the more dense it will become!
Tip: Use two or more strands of yarn at the same time to fill up the donut faster!
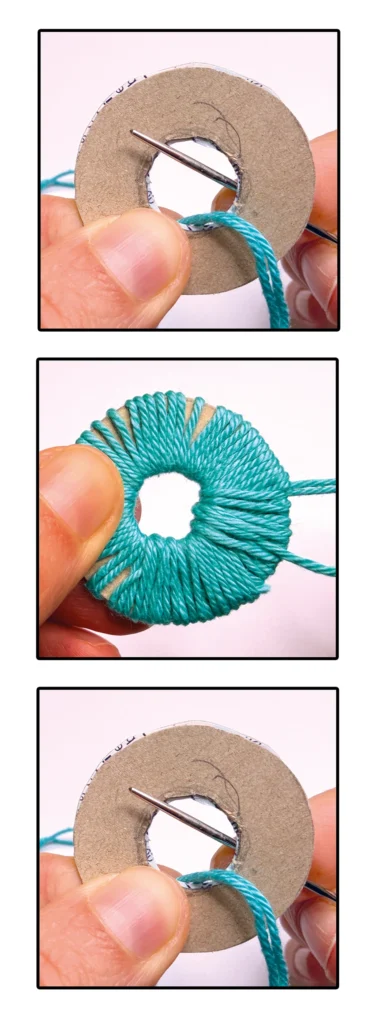
Step 3: Carefully hold the middle of your donut and cut the yarn all the way around the outer edge of the cardboard. Make sure you cut every strand of yarn that is wrapped around the donut cardboard.
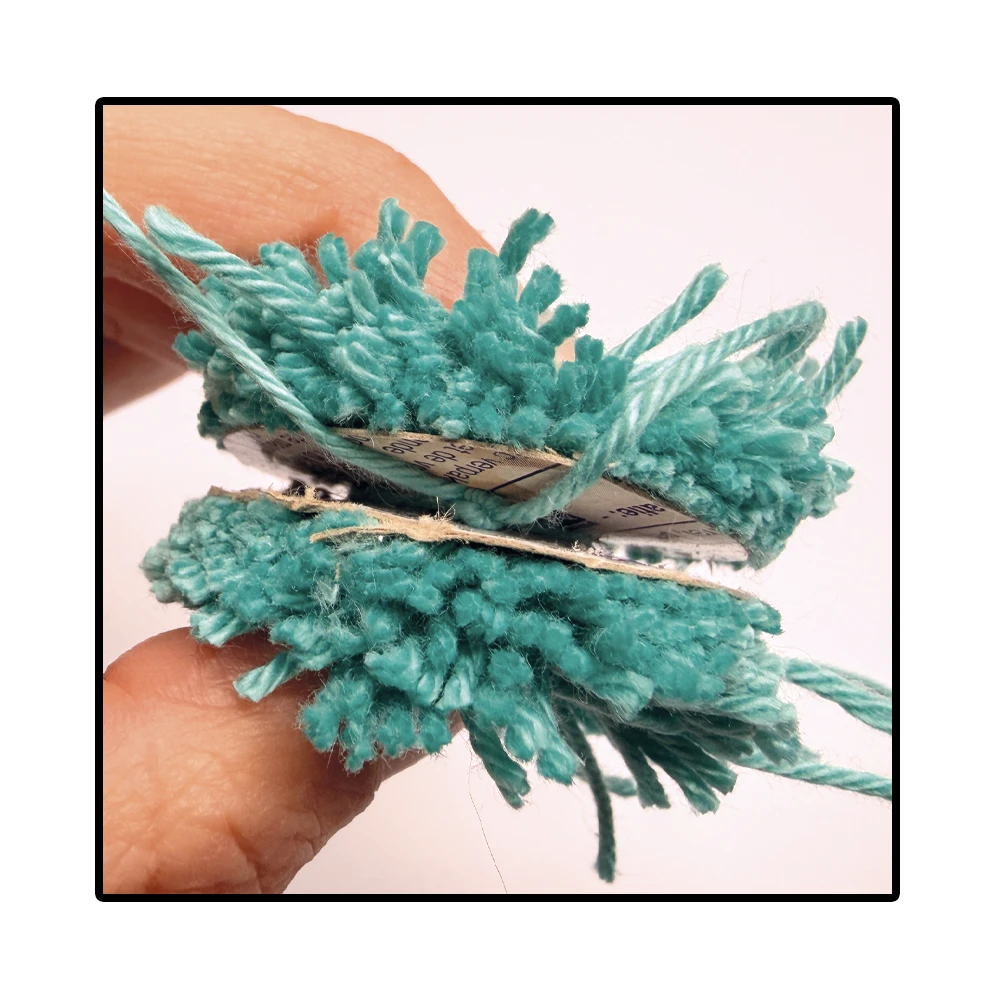
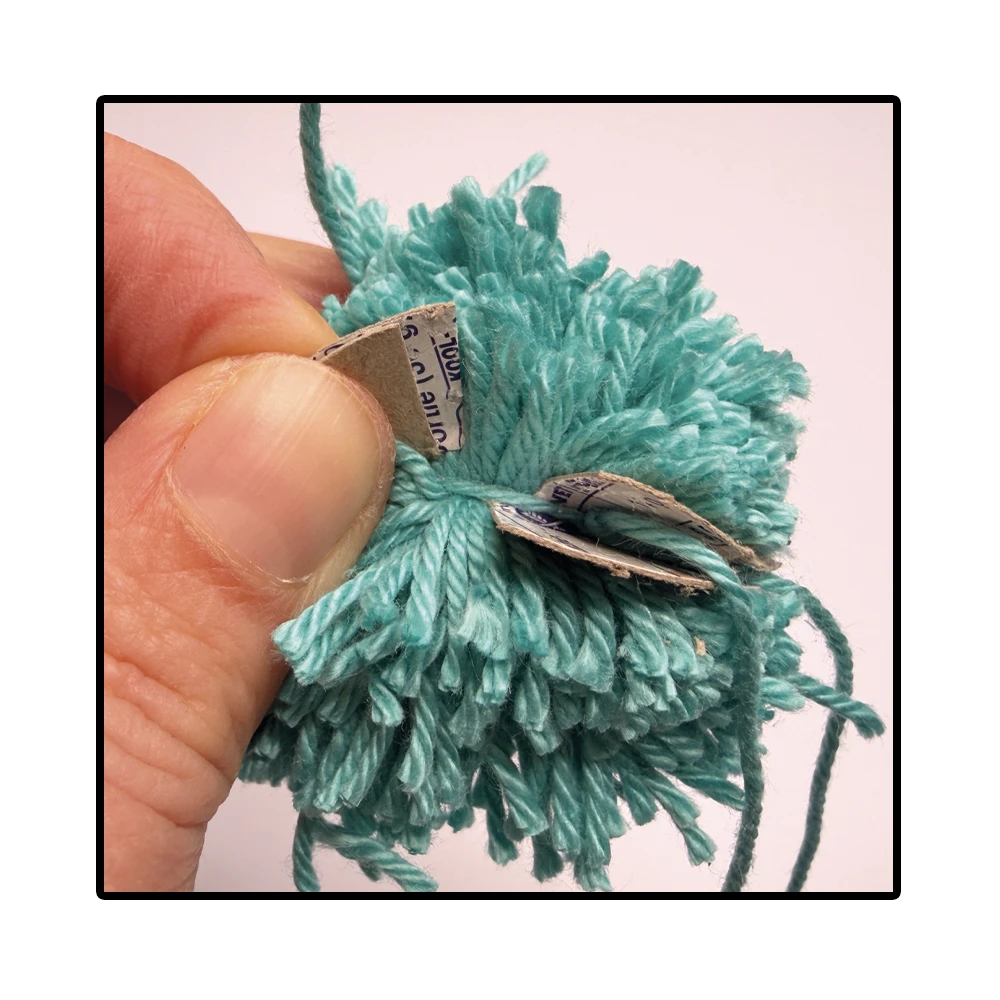
Step 4: Slide an extra piece of yarn between the two cardboard templates and tie it tightly around the center to secure the the yarn, You will use this piece of yarn to sew the pompon on the hat, do not cut it off if you want sew it on a project when it is done.
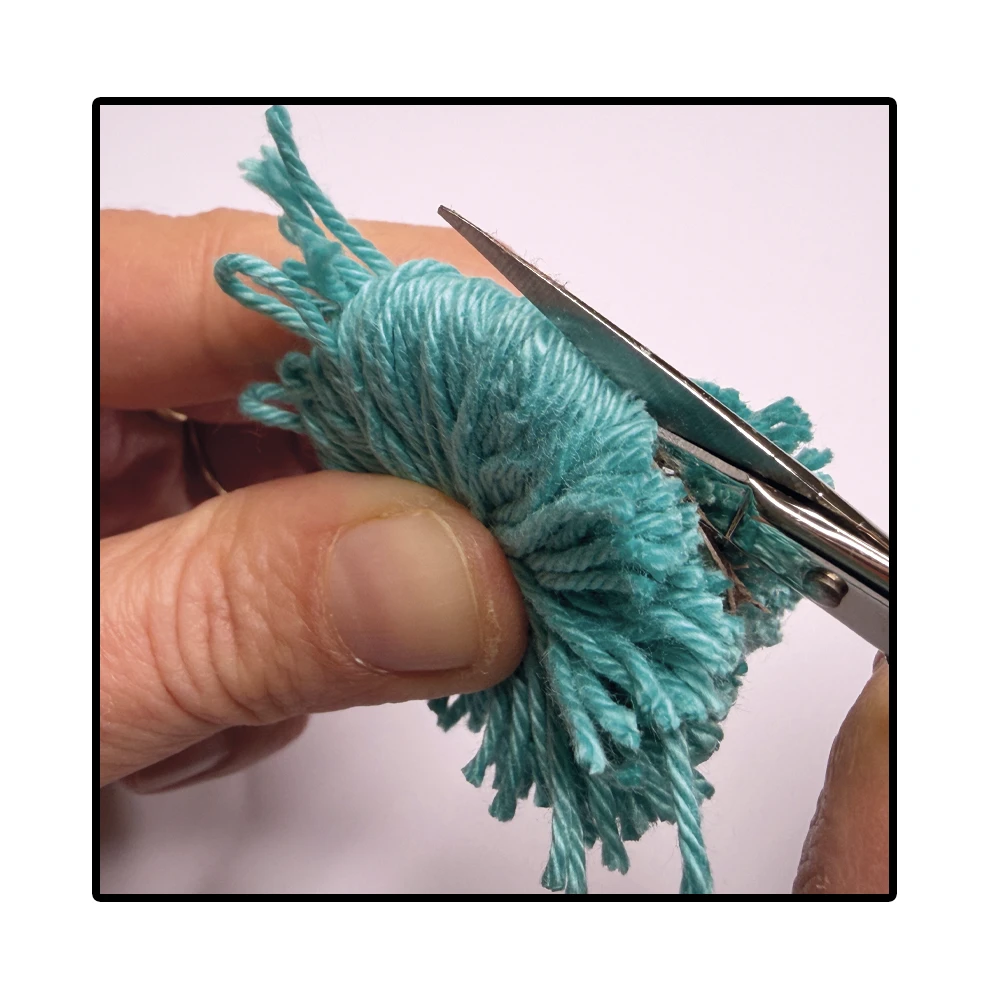
Step 5: Cut the cardboard and remove it carefully from the yarn. Shake it to fluff it up. It may look a bit oval at first, and there may be a few longer strands sticking out.
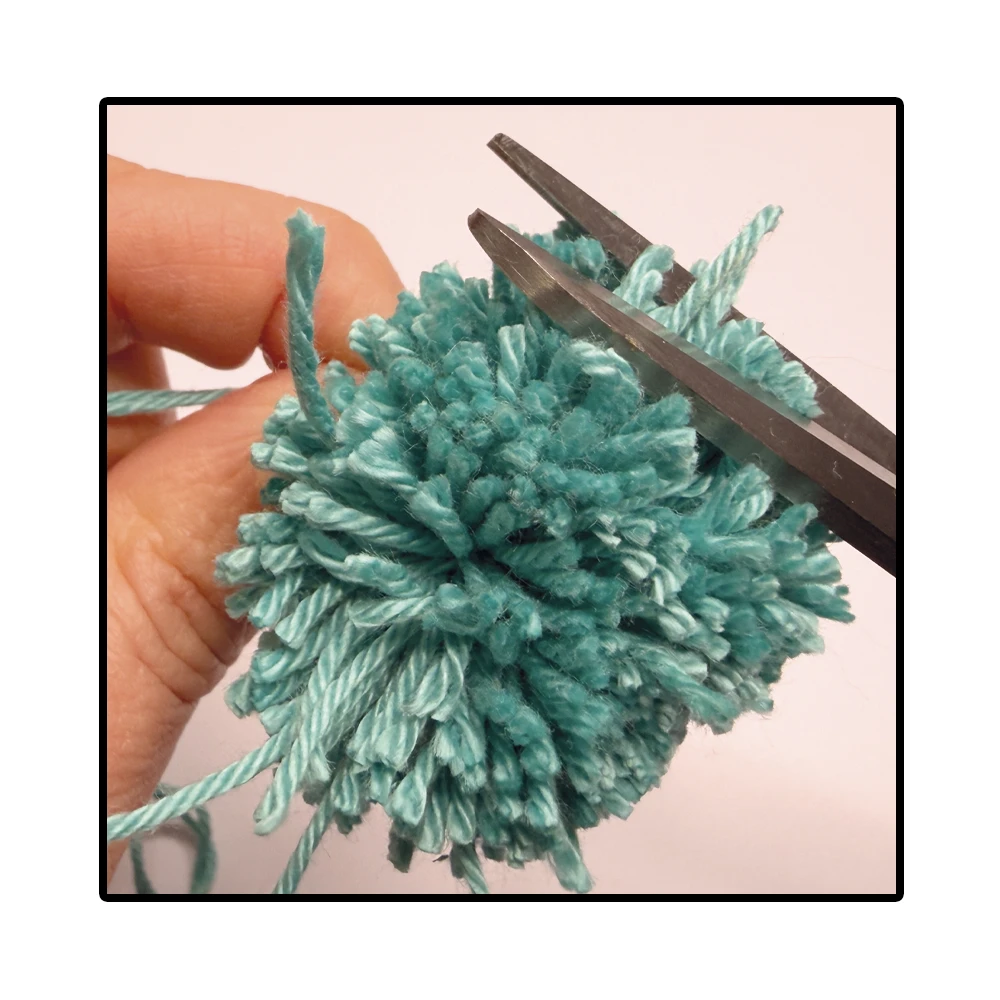
Step 6: Use scissors to trim it into a neat, round shape. Hold on to the long tie straps when cutting it into shape and keep turning. Do not cut off the extra piece of yarn if you want to sew your pompom on an Amigurumi.
Now sew your pom-pom onto a cute amigurumi toy, hat, or scarf. They a fun way to add a playful finishing touch to many crochet or knitting projects. You can also turn a them into a little toy by gluing felt face parts onto it.
When I was a young girl, I loved making little chicks from pompoms by gluing on a tiny beak, eyes, and feet. My mom always had lots of leftover yarn, which was perfect for making colorful pompoms. It was such a simple and fun craft, and a great way to use up small pieces of yarn.
Make your pom-pom faster:
You can wrap the yarn around the cardboard faster by cutting a slit in the cardboard. This makes it easier and quicker to wrap the yarn around the template. However, you will not be able to completely fill the circle, which may make it less dense.
Personally, I prefer to keep the donut shape closed so I can completely fill it with yarn. This creates a fuller and denser version, which usually gives the best result for amigurumi, hats, or other fun crochet projects.
Free downloadable PDF Template
I made a free printable pdf with templates in several sizes. This is a letter format pdf, but it will print on a4 paper as well. Make sure to print it out at 100% to get the sizes printed on the donuts.
There are many more helpfull tutorials on my blog. I have made many free Amigurumi patterns and step by step tutorials to learn how to crochet. Like this detailed Amigurumi beginners guide. My beginners guide has many video’s included to help you with every step.